Prerequisite
Tenant Id : contoso.onmicrosoft.com (You can find your tenant Id in you D365FO Help Page)
Storage account name: soletechsessattachments
Container Name : soletechsattachmentcontainer
“You can choose any name for storage account and container make sure you have noted and this will be used in Application parameter > Azure Blob storage“
Create storage account
- Login to www.portal.azure.com
- Click on Storage Account

- Click on create
- Select required Resource group
- Define Storage account name as soletechsessattachments
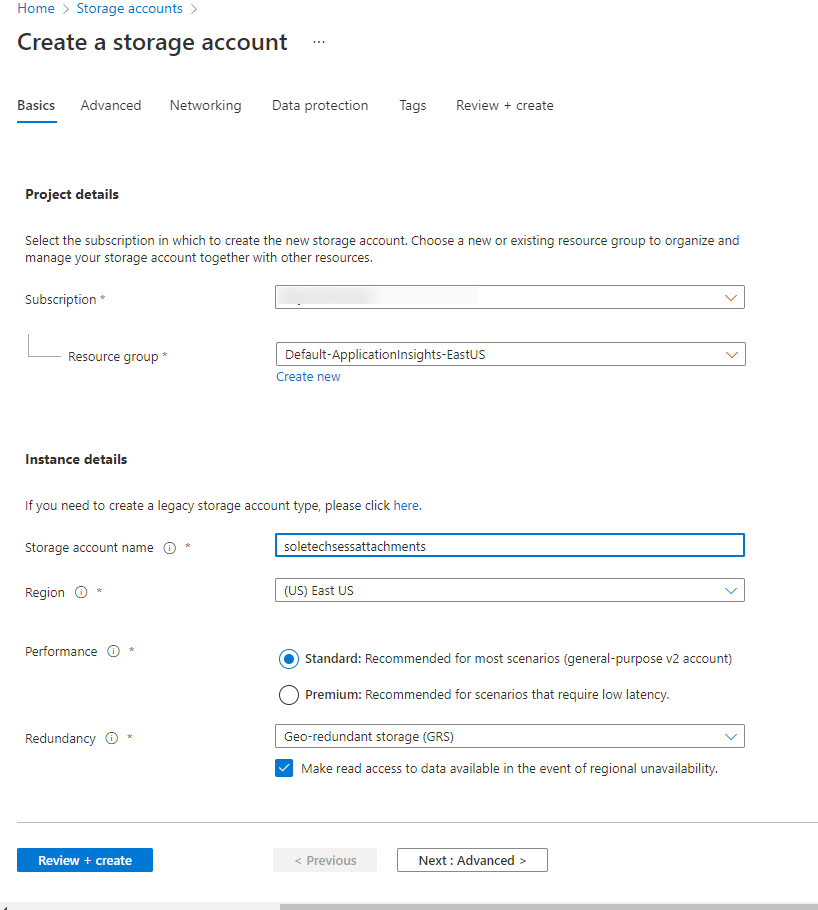
Click on Review + Create on bottom left corner
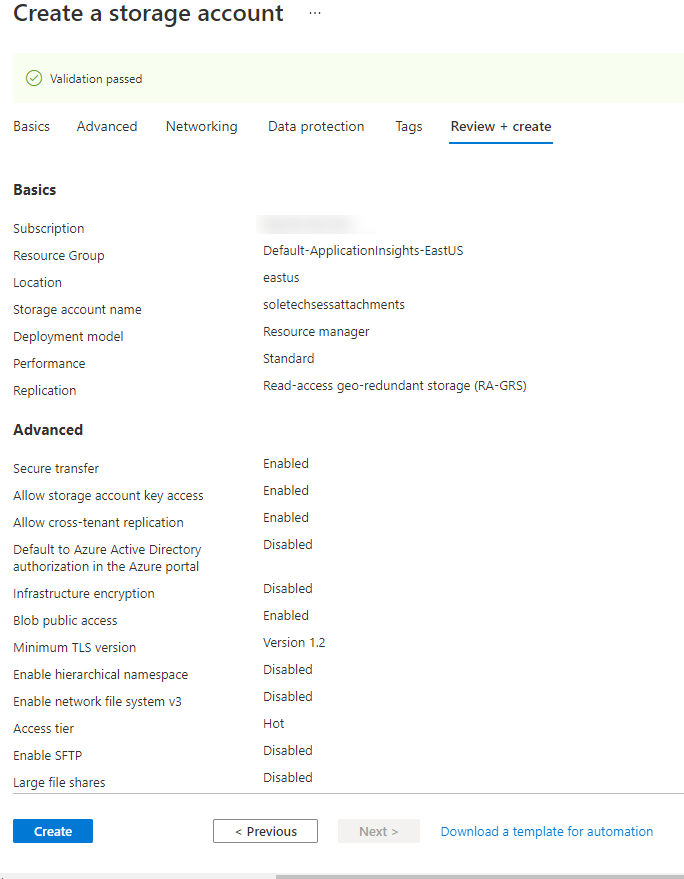
- Click on create
- Wait for Deployment to complete
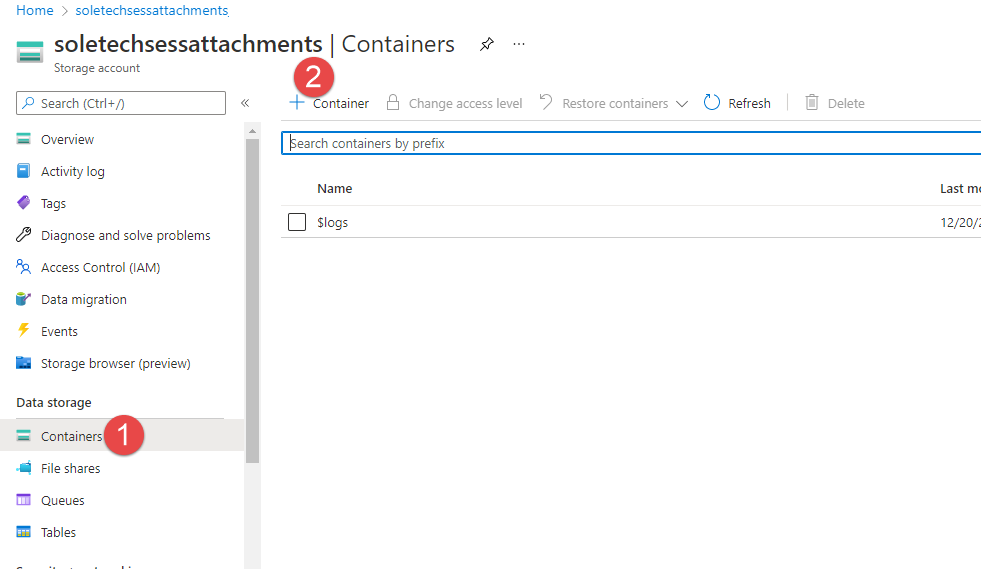
- Click on Go to Resource

- Click on Containers no 1
- Click on Container no 2
Define name as soletechsattachementcontainer and Public access level as private(no anonymous access)

- Define Container name
- Created container will be listing on the page
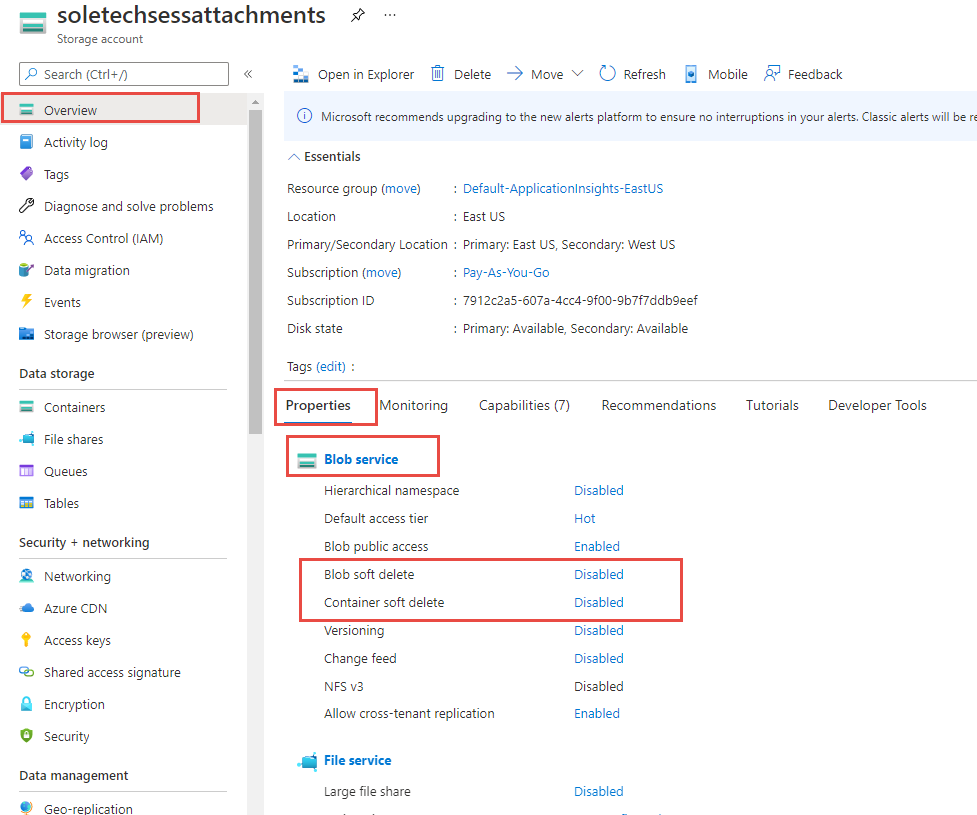
- Verify Blob Service delete option should be disabled.
- Click on create
Copy the Connection string
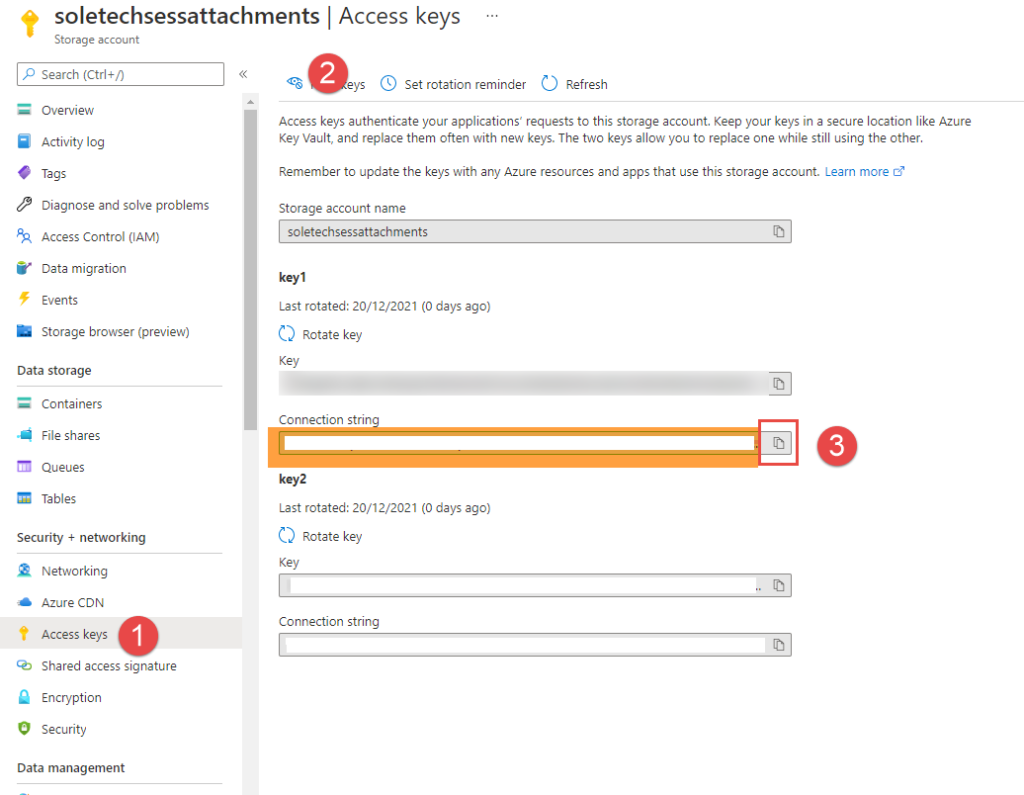
 Click on Access keys
- Click on show keys
- Copy the Connection string and Save it in NotedPad
Application paramter
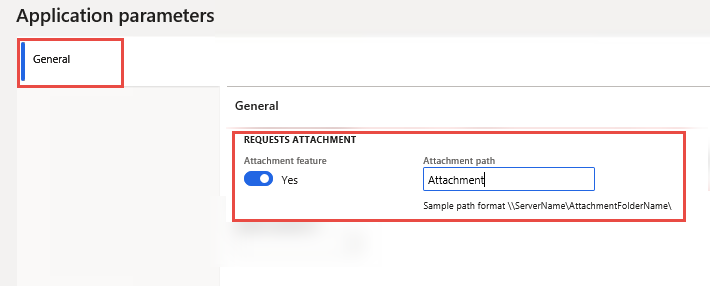
- Enable Attachment Feature
- Define Attachment path as Attachment
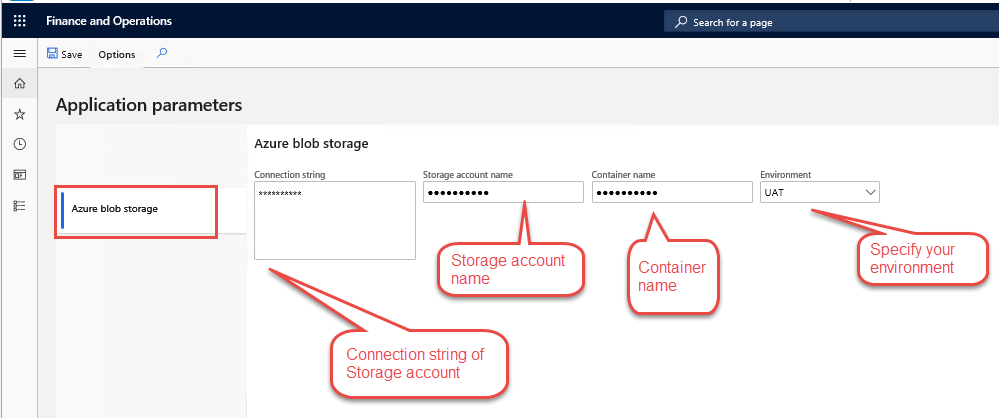
Azure Blob storage
Create a directory in Container
- Define connection string
- Define storage account
- Define container name
- Select the enviroment
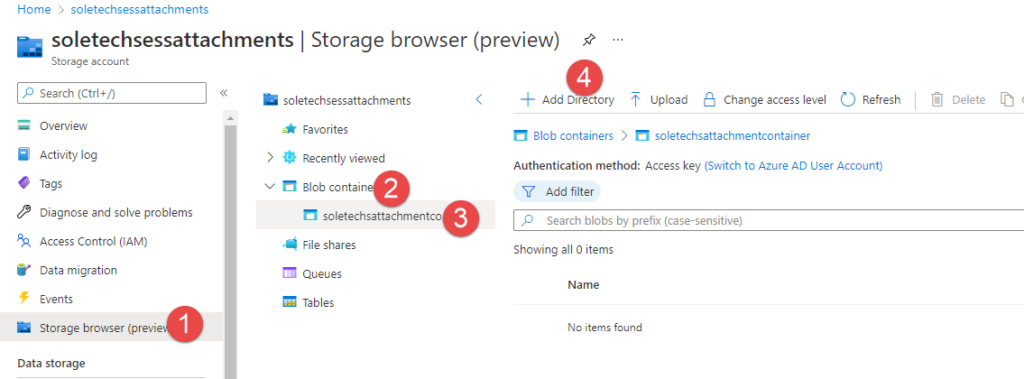
- Click on Storage browser (preview)
- Click on Blob container
- Click on soletechsattachementcontainer
- Click on + Add Directory
- Name should be your Tenant Id ex: contoso.onmicrosoft.com
- Now Contoso.onmicrosoft.com directory is created
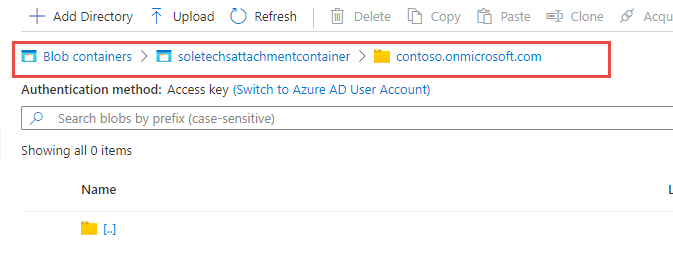
- Create UAT Directory in Contoso.onmicrosoft.com (Demo Case this will change for Production and other environment)
- In Application Parameter you defined your Environment is UAT in Azure Blob Storage, In that case you have to create UAT folder.
- Inside the UAT Directory Create 3 Directories
- Attachment
- Letter
- Payslip
Make sure you have defined correct environment for Azure Blob Storage. If you have Prod, UAT, Test & Dev Environments which using the attachment process you should have Prod, UAT, Test, Dev Directory in contoso.onmicrosoft.com. IF you failed to create this directory Attachment wont work.
