Note : The following step are valid only incase there’s no any customization on client
Prerequisite
- Get the HCM deployable Package from Soletechs
- Get the License from Soletechs
- Add the license in deployable package Refer to https://docs.soletechs.com/?knowledgebase=add-the-licenses-in-deployable-package
Add the Package to Asset Library
- Login to LCS https://lcs.dynahttp://mics.com
- Open your D365 Project
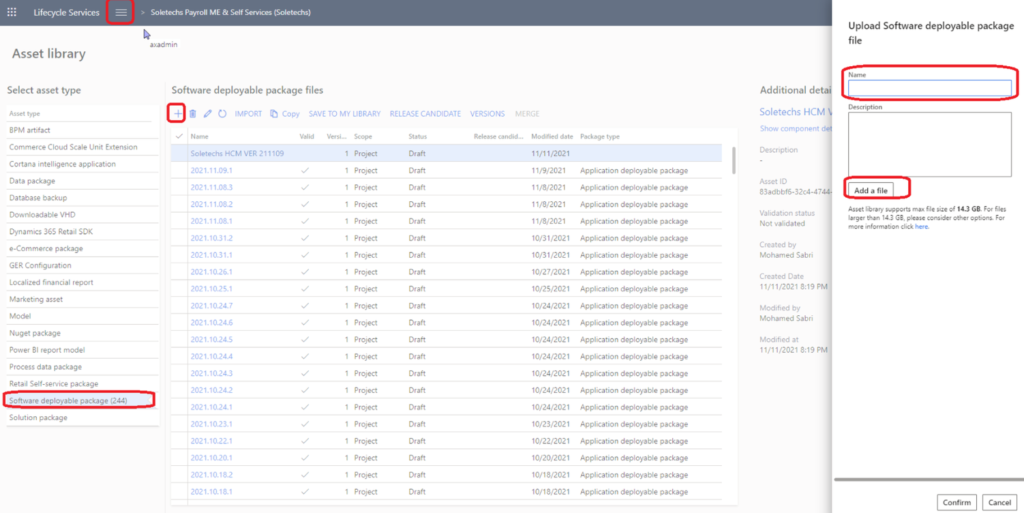
- Go to Asset Library > Software deployable package
- Click on + button
- Define file Name (Soletechs HCM VER YYYYMMDD)
- Click on Add File
- Upload deployable package which is provided by Soletechs
- Once you done Click on Confirm Button
- Wait for 2 mins, the deployable package will be validated and show the Package type as Application Deployable Package

Deploy the package to D365 Environment
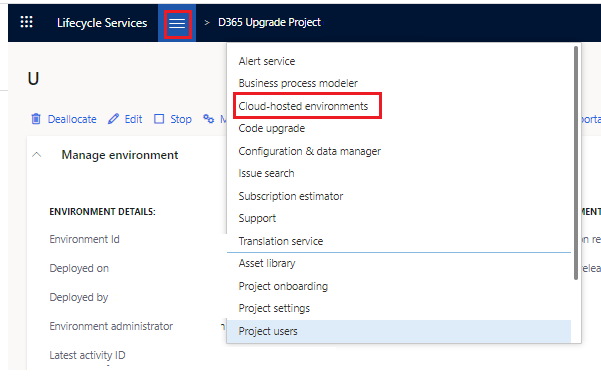
- Click On Burger button

- Click on Cloud Hosted environment ( this wont show UAT/ Production)
- Select the environment
- Click Full Details
- Click on Maintain
- Click Apply Updates

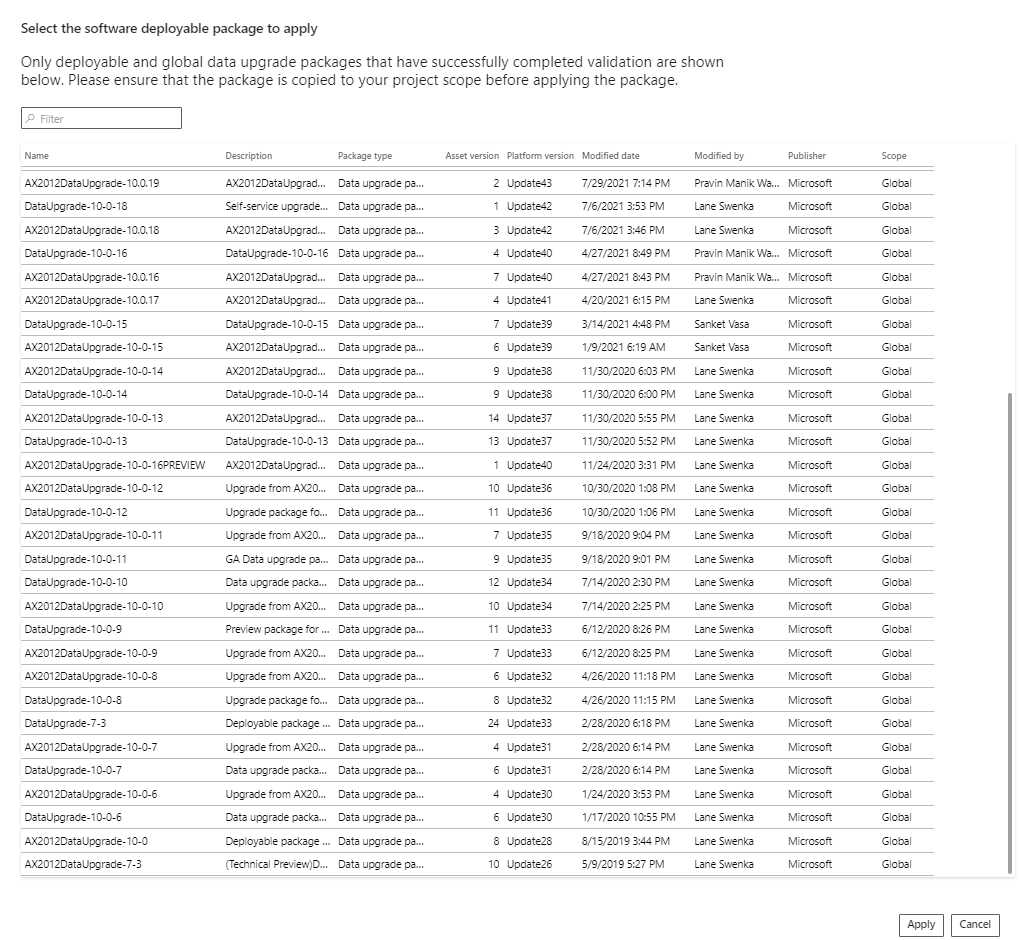
Select the package which we updated in the previous step
Click on Apply

